Hey folk, do you want to Root Redmi 9A new smartphone? If yes then this guide is especially for you. In this article I’m going to guide you in-depth, so after reading this guide you can easily root your mi 9a device.
But before going to the direct rooting process, you should have information about rooting. Like Pros and cons after rooting a device, and most asked why you need to root your android smartphone. Soon you’ll get every answer in this article. Until stay tuned with us.
Contents
Disclaimer
SafeBoxGuide is not responsible for any kind of loss. The method of rooting in this article only works for a specific device. Don’t try this same method for another device, if you do then this may be the reason for your getting brick.
Be careful during rooting your Asus device. I suggest that you read the process of rooting at least two times, because if you read this guide two times then there are fewer chances of mistakes by you.
And last but not least SafeBoxGuide is neither affiliated with any program and not sponsor any application to mention in this article. I only guiding via this application because these are easy to use and easy interface.
Why do you need to Root Redmi 9A?
Behind every work there is the reason. So before rooting your android device you should have a proper reason to root your smartphone.
But before going to the next steps we should be thankful to the TWRP team and xda developers, because these things can’t be possible without them. Whether there are a lot of third-party applications available on the play store, but xda developer and TWRP both are the sign of trust. So you can go with them. Did you enjoy this guide?
As everyone knows after rooting, smartphones became very fast. But it’s completely a myth. Yes, I agree with that after rooting your device would perform better than before.
But It’s not necessary because this process is not as easy as you think. And with your a bit mistake your device may brick. Here I guide you some easy steps to root an android device, if you love to root android phones then you’ll love this guide. Before going to the next level Let’s jump to the advantages of rooting.
Pros Of Rooting device
Like every guide of our website, I’m going to tell you some popular pros about the rooted device. So make sure you have to read this carefully. Because I don’t know which one exited you to root your redmi 9a.
- After rooting your device performance would be increased, and you can customize your smartphone according to your need.
- The most popular feature is you can install the Latest android version and easily install a moded application that means you can use the pro feature without paying. Isn’t it interesting? dropdown your thoughts in the comment section.
Cons Of Rooting Device
Along with the pros of rooting there is a dark side of rooting an android device, which I’m going to discuss below. These are-
After rooting your device warranty is completely gone, it means you can’t claim the manufacturer if any part of your device is damaged! but don’t worry you can easily get back your warranty, how! It’s too easy to delete every file of magisk by using the root browser.
Pre-requirements before Rooting
Make sure you would follow some steps in order to root your smartphone. without following these steps you can’t root your redmi 9A. These steps are –
- Device battery should be above 50%
- Get backup of all important data in the device ROM
- Unlock Redmi 9A bootloader
- Enable USB debugging and OEM unlocking these both options are inside the developer option.
- Make sure you hav
- e installed ADB drivers in your PC/Laptop if not then install first,
- Now download the latest Magisk.Zip version and copy this into you device storage (also called ROM)
I hope you have completed all the steps because all are essential, now below the next process about the root android device.
Root Redmi 9A [Without PC/Laptop]
Yes, you read right in the above heading. Rooting redmi 9a without pc is possible by using some application which is mention below, These are –
- Download KingoRoot app from official website
- Install and open the application and click on “Try it Button”
- Soon an Android logo will appear just click on that
- Rooting process is starting now in your device
- Once the process is done a notification will pop on your screen i.e.” Successfully Root“
- Now you’re good to go, customize your android device as you want.
Congrats! Now your device is rooted successfully. So if you have any query related to this drop down your comment below. we will reply as soon as possible.
Guide To Root Redmi 9A With SuperSu
SuperSu is also the most popular method to root any android device. But for rooting make sure you have followed our step by step guide. Believe me, you would be thankful to me after rooting Samsung device via this method.
- Download SuperSu Zip file on Redmi 9A – check out here
- Next, save this zip file into device internal storage
- Now Boot Redmi 9A into TWRP recovery mode. This recovery helps you to boot your device.
- In TWRP Mode there are lots of options available on screen
- You have to click on “Tap on Install“
- Next, select the zip file which you download earlier
- After selecting the zip file tap on “Confirm Flash“
- Now Reboot Redmi 9A
- Great! You have successfully Root your Redmi 9A device by following the above method. Are you enjoying this method, Drop yes in the comment section. Hope this guide is really helpful for you.
Our team is ready to help you root your android device remotely. Check out here to know more about Safe Box Guide Experts Appointment.
Root Redmi 9A Via One Click Root (Recommended)
This method is most used and successful software to root Redmi 9A device. This software is paid and over 10000+ devices rooted successfully.
Your device will be root is guaranty. Else 100 % Money refund instantly. Sounds Crazy!
Requirements
- Charge device 30% Battery or more.
- Make sure you have a USB cable.
- A PC/Laptop (May be required)
Steps to Root Redmi 9A Via One Click Root
- First, Go the one click root website – Check Out
- Then Click on Root Now button.
- Next, type your device brand name. Next, type device model number, and tap on next button.
- Now select device version and tap on Verify Root Rootable.
- If your device is rootable then you need to pay the fees and follow their instruction to root your device.
Hope you understand all the steps mention above. Now check out the One Click Root website to implement the process. Believe us rooting more than easy as you think with the help of One Click Root.
In case you want to check whether your android device is rooted of not after following this method then follow the below mention steps.
Steps To Check Root Status
Check Root status Of Redmi 9A
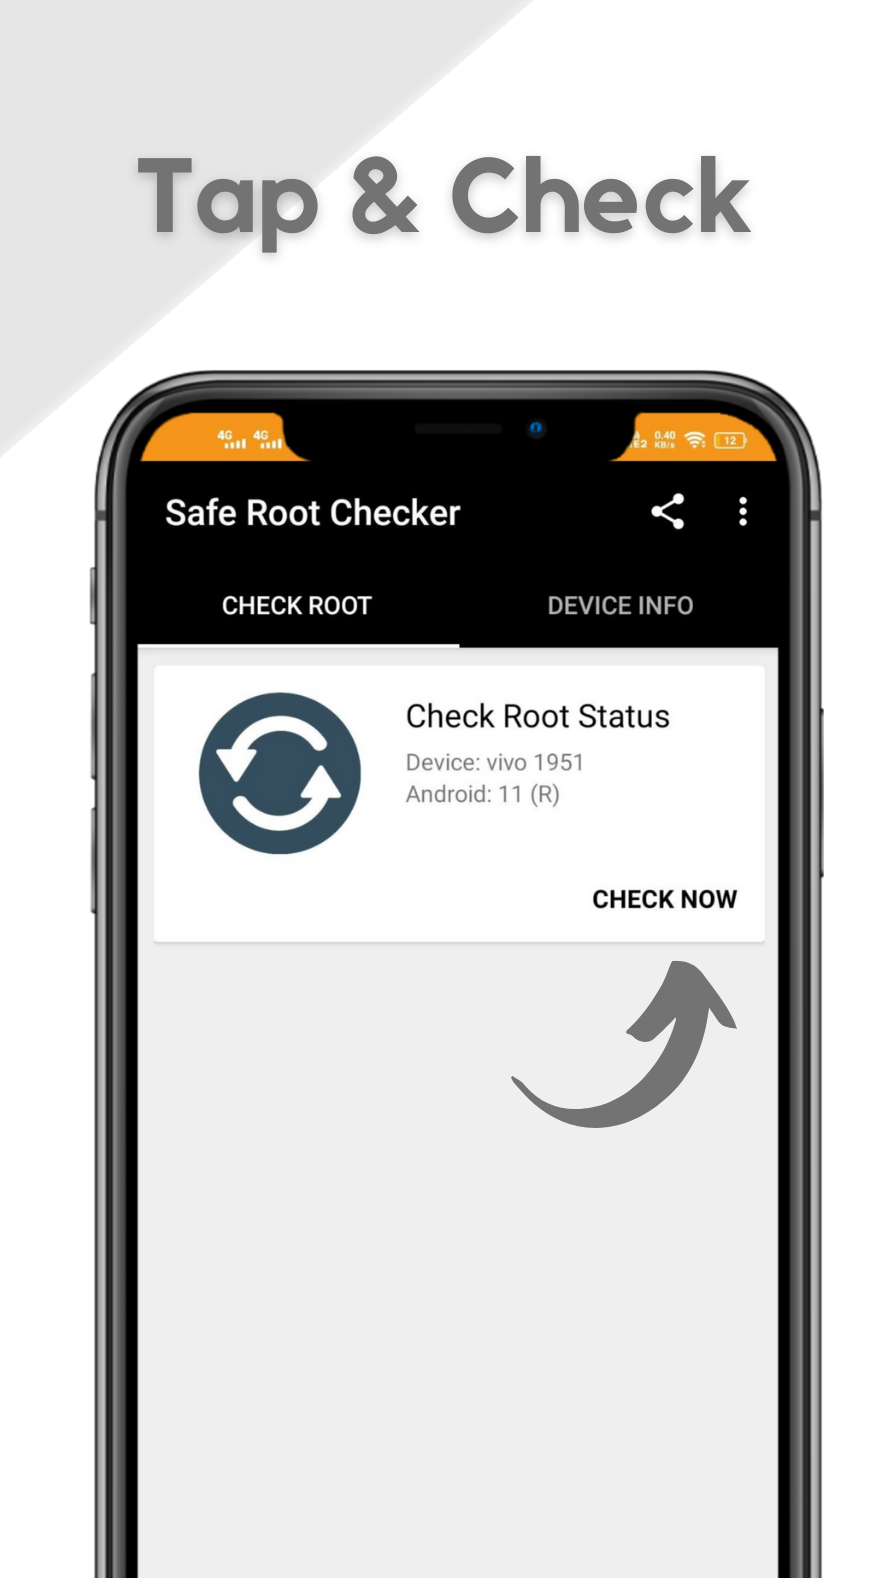
- Download Safe Root checker App – Check out here
- After installing properly, Next open application.
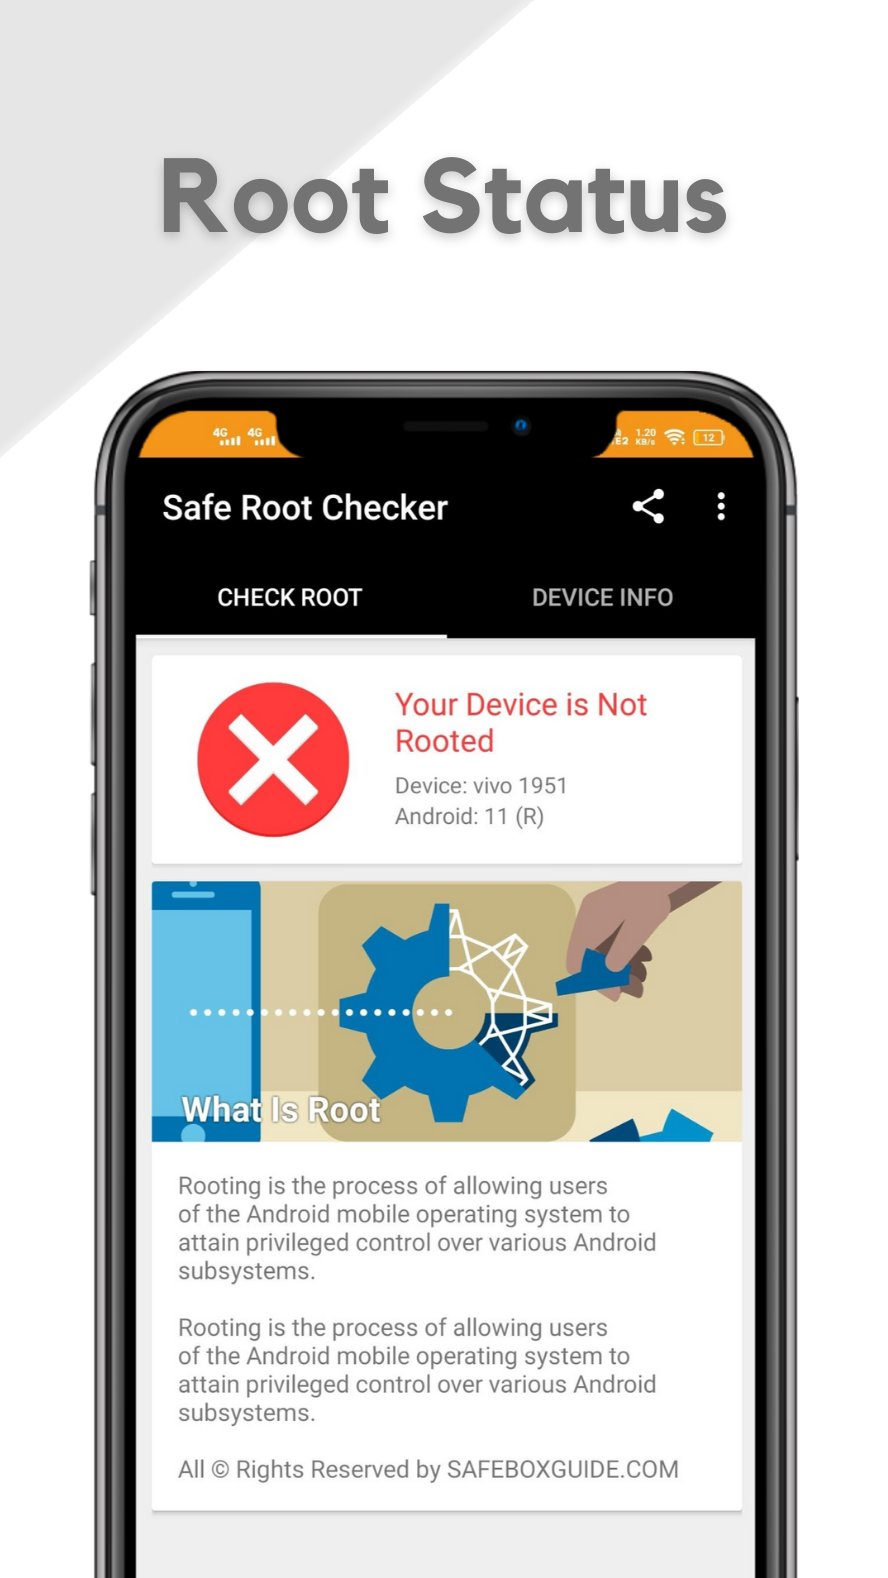
- Next, Tap on “Check Now” If your device is rooted then it will show you the messages i.e “Congratulations! Root access is properly installed on this device” Else you’ll get a message that “Your Device Is Not Rooted”
Isn’t it’s too much simple and time saving application.
For more clearance below we added the infographics to show you how it looks like. The first screenshot show you tap on the verify button and the second one shows you that your device is rooted. I hope you enjoy this guide. Drop down your thoughts on the comment box for more suggestions.
Still want more information about safe root checker. Then make sure you check out the Safe Root Checker official released post here.
Check out the step by step guide to unroot redmi 9A android device.