
If you want to start your online store, then there are many things that you need to pay attention to and that you need to consider. Making a good and quality online store can be a demanding and challenging job. You can pay to have a solution created from scratch, but it will be costly.
Another much less expensive option is to use some of the ready-made solutions. Of all the free and ready-made solutions for creating an online store, we will mention WooCommerce.
WooCommerce is the best online store solution. The WooCommerce platform powers nearly 30% of all online stores worldwide. Many WooCommerce extensions are commercial, but you have several tools and capabilities to make a fantastic online store with the free version.
Also, before we begin, we have to point out that in this article, we’ll be using WPMU DEV’s fully-dedicated and managed WordPress hosting. Want to follow along? Get 20% off any of their plans here.
Below we will describe how to set up WooCommerce and start your first online store.
Contents
How to Start?
At the very beginning, the first prerequisite is that you already have hosting and a domain. There are many quality hosting providers that offer to host solutions specializing in WooCommerce, and one of them is Bluehost. As far as domain registration is concerned, GoDaddy is currently the best-known and most popular domain registrar globally.
Once you have purchased the hosting and domain, install WordPress.
There are several methods for integrating WooCommerce into your WordPress sites. However, installing it from the admin panel is the simplest option.
Open the WP admin dashboard and click on Plugins, then Add New. In the search box in the upper right corner, type WooCommerce and the plugin will appear first on the list.
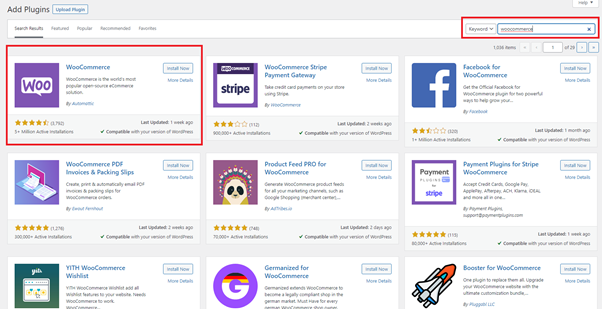
Then click on install and wait for the plugin installation process to complete. After installation, you must activate the plugin by clicking on Activate.
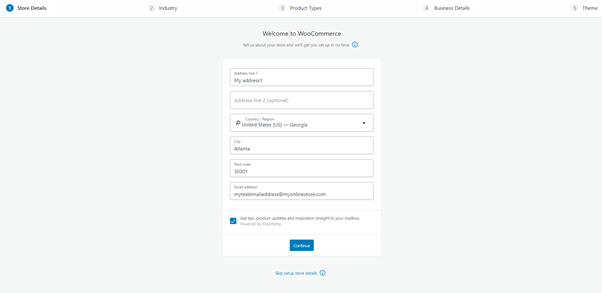
After activating the plugin, the process of creating your online store will start automatically. The first page that opens is your geographical location. You must fill in your details such as an address, city, state, and zip code.
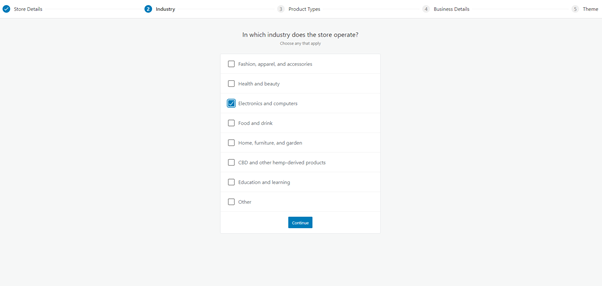
After that, the second step appears, and that is industry. Select which industry your business belongs to and click Continue.
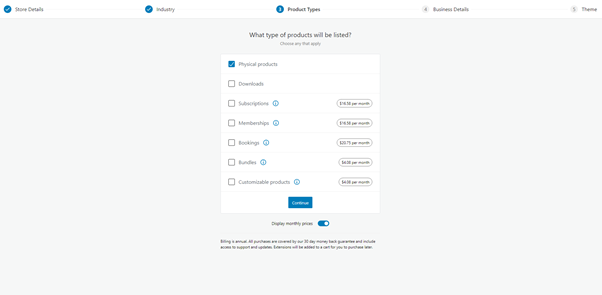
Type of Product
In the next step, you need to choose the type of product you will sell. You can sell both physical and downloadable products for free. However, if you decide to sell subscriptions, you will have to pay a fee.
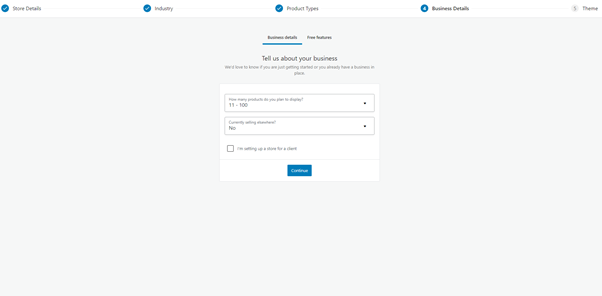
Business Details
In the fourth step, you need to enter the Business details. They will ask you how many products you intend to sell and whether you have another online store where you sell your products. Select one of the offered options and click Continue.
Installing a Theme
In the last step, you will be able to choose a theme. Also, we have to mention that this is not a required step, you can, but you don’t need to install the theme. You can do this step at any time later.
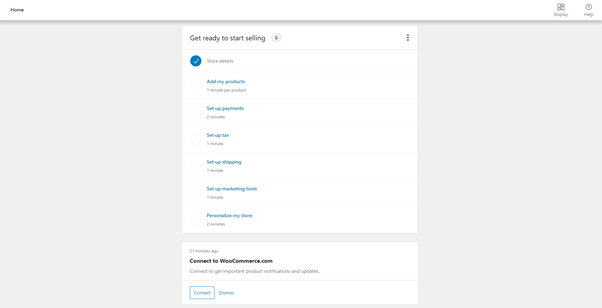
Additional Options
After completing these five initial steps, we’re ready to move to the final tuning and entry items. On the next screen that will appear, we have several options that we should go through:
- Adding your products
- Setting up payments
- Setting up tax
- Personalizing store
- Setting up wizard
- Setting up shipping
Add My Products
When you click on Add my products, you will have several options available. You can add products manually, import a spreadsheet, and migrate products from other platforms such as Shopify.
You’ll probably select the option to add the product manually, and the fields you’ll need to fill out include title, description, photo, pricing, shipping, and a slew of others.
The field for entering a new product is very similar to the classic WordPress field for adding articles.
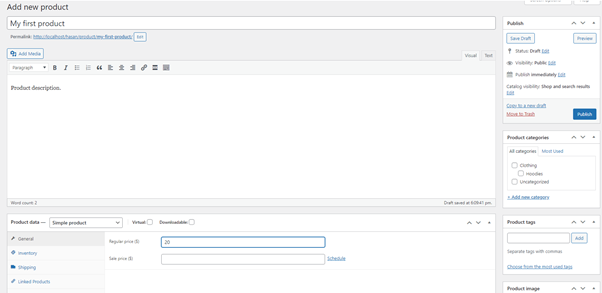
Enter the item’s name, followed by as detailed a description as possible. Remember that a more detailed description is essential for SEO and better positioning your pages on search engines.
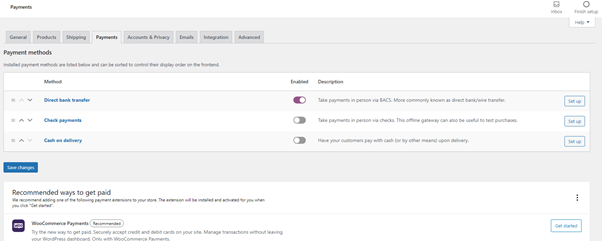
Setting up Payments
The following vital option is payments.
You tweak billing in this option – how you charge your products and enter your bank details and account numbers to receive money. There is a lot of payment plugins for WooCommerce, and the most used are PayPal and Stripe. Note that not all payment gateways are free of charge. You will have to pay for some of them.
Setting Up Tax
When it comes to the tax – in this option, you adjust everything related to the tax. You choose not to calculate tax on items. You can add the possibility that the tax is calculated depending on the location of the customer. WooCommerce has a lot of great options where you can customize absolutely everything.
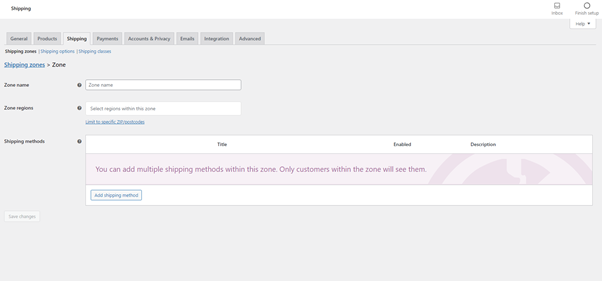
Shipping
The next thing you need to do is set up shipping. Within this option, you can confirm your store location and then adjust the price of sending items to your customers. You can define the price for your country but also for the rest of the world.
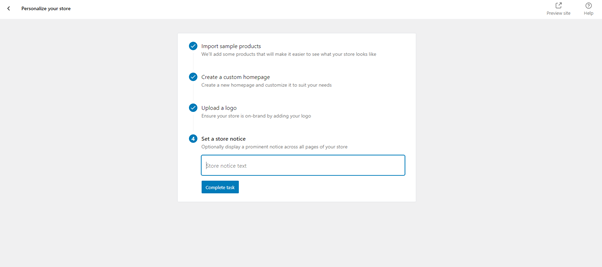
Personalizing Your Store
The last option in the list is to personalize your store. You can import demo products, create a custom homepage, upload a logo, and set up a store notice within this option.
Once you have completed all the above steps, your online store is complete. Now you can start adding items and preparing a marketing strategy.
Below we will add one item and explain what you need to pay attention to for your online store to be as successful as possible.
Click Products and then Add New from the admin dashboard. The page for adding an item will be displayed. There are four significant options that you need to be careful with: the item name, item description, item image, and item price.
The Item Name
In the title field, type the name of the item you’re selling. Allow for a short name while still letting the buyer know what it is about. We do not put a description in this field, but only the item’s name, 2-5 words are enough.
Item Description
Below the title field is an item description field. You should describe each product in detail, and it should also guide you about SEO product descriptions.
If you enter the SEO description correctly, your page will be better displayed on search engines, and based on that. You will have more visitors and a better chance of selling the product.
Item Price
Below the item description field is a field with the price and attributes of the item. This field is vital. It is best to conduct research and learn more about the costs of the item you are selling before publishing it.
If you have lower prices than the competition, then there is a good chance that customers will choose to buy on your site.
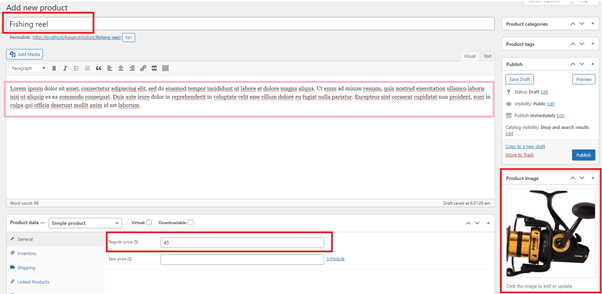
Item Image
The fourth field is the image of the item. Make sure the photo of the product is of high quality. If you can’t have an original photo of the item in the sense that you take it yourself, then try to find the best possible high-quality image on the Internet.
This way, customers will better see what they are buying, and a high-quality image will give a better look to your pages. There are numerous excellent WordPress plugins available to assist you in optimizing images without sacrificing quality. Your pages will load quickly, and the photos will be of high quality.
Ensure you always have related products or products similar to those on the item page that visitors are currently viewing. In this way, you increase the visitor’s chance to decide on one of the items offered to him.
For the best possible success and sales, do your best to optimize your online store for mobile devices. Today more people use mobile devices than computers.
Moreover, if your pages aren’t optimized and don’t display nicely on small screens, then visitors will leave. Like a regular WordPress site, WooCommerce can get more options and better functionality by using different extensions.
On the official page, there are a lot of extensions that are classified by categories. There are extensions for tax, membership, shipping, payments, store management, and many others.
Additional Plugins That Can Help You Out
Below, we will mention some of the best WooCommerce extensions that make working with and managing online stores much easier.
WooCommerce Order Export PRO
WooCommerce Order Export PRO is a great plugin that serves to extract your data. You can extract any data from your online store. The advanced options of this add-on allow sending exports to the inbox or an FTP account automatically.
This option is perfect if you are dealing with a sales model known as dropshipping. Within this plugin, you can reorder columns as you need, set up multiple automatic exports, and so on.
We must mention that this is a commercial version of the plugin, and we advise you to try it.
WooCommerce Table Rate Shipping PRO
WooCommerce Table Rate Shipping PRO is an excellent plugin for WooCommerce that allows you to calculate destination-based shipping costs, and you can filter by country, zip code, item weight, item quantity, and many more features.
Some of the best options of this add-on are creating demanding shipping rules based on product attributes such as weight, number, and many others.
Each shipping method can have its name, and you can force your customers to use the one you prefer. You can also hide shipping methods in a spreadsheet, and you can quickly import/export and edit shipping methods.
Direct Checkout for WooCommerce
Direct Checkout for WooCommerce is a great add-on that can skip the cart and send customers directly to checkout. Another great option of this add-on is powerful buy buttons.
When the customer clicks on one of these buttons, it will add the product to the cart. Furthermore, it automatically redirects you to the checkout without visiting the cart page.
You can create personalized buttons for individual products, and then you can place them in any location on your online store, whether it’s a blog post, widget, or any other site.
We must note that you mustn’t enable Ajax for cart buttons. Otherwise, this add-on will not work correctly.
Conclusion
As can be seen from this article, WooCommerce is a perfect and powerful tool that will help you to make a fantastic online store in a few moments. It is a solution that can please even the most demanding users. Since about 30% of all online retailers in the globe use it.
WooCommerce’s large community is another benefit over competing for eCommerce systems. Be sure to join the community and learn from other people’s experiences.
Also, exchange impressions and opinions, and you will also find skilled artisans who are always ready to help you achieve the best results with your online store.